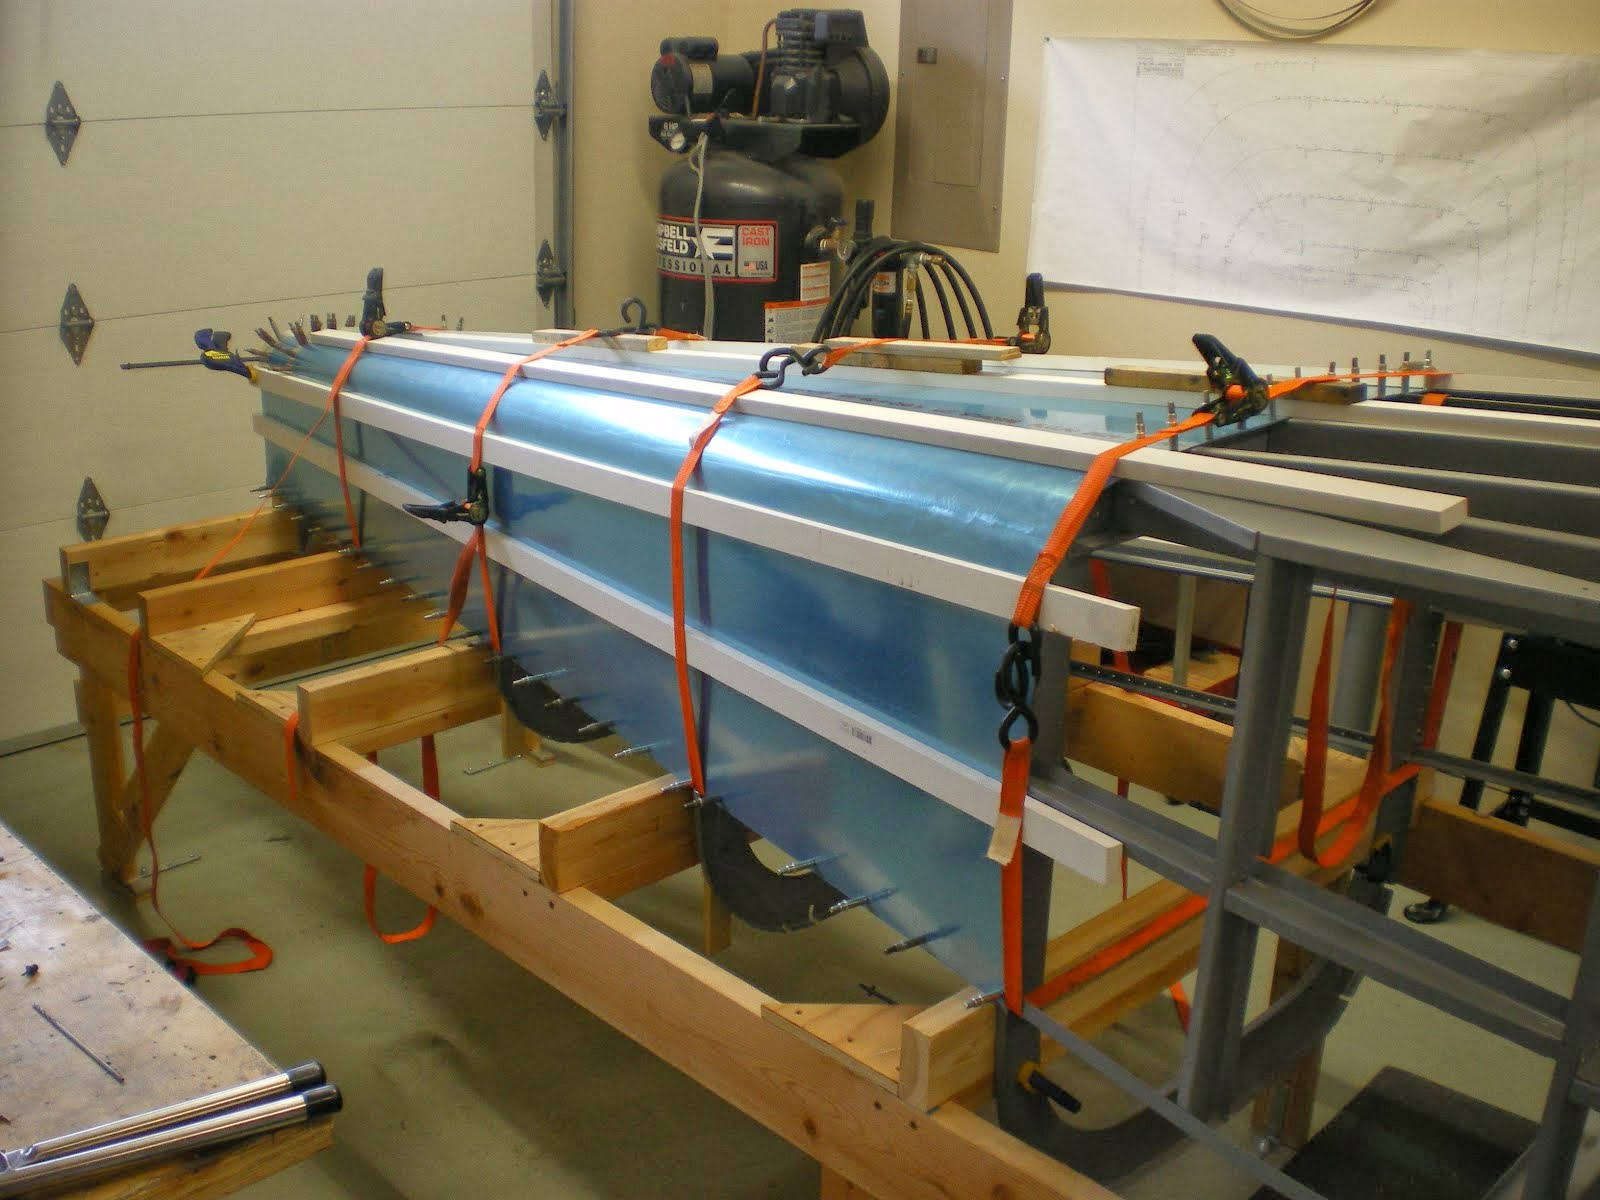
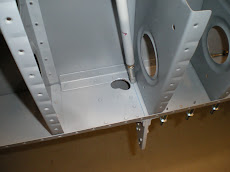
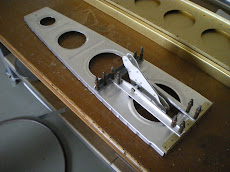
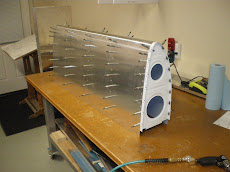
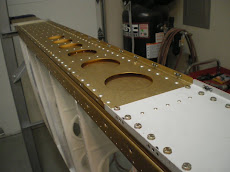
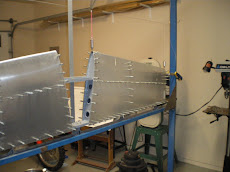
I have finally gotten around to the tank skin. I had to go to Home Depot and get some narrow boards so I can strap down the skin. I lay boards across the skins on top and bottom and then strap it down in about 5 places. The boards apply even pressure across the skin. I start drilling on the top skin near the spar and work my way towards the leading edge of the wing. I then go over the edge and around working towards the bottom spar. I have not drilled the screw hole on the bottom yet due to my skin being slightly long. I have ran it over the edge of the bottom skins and marked them. I have to take the skin off and trim the excess 1/8 inch off. I also did not pre-drill the bottom holes for this very reason. Once the skin is trimmed and has a perfect fit, I will drill all of the screw attachment holes to #19 and start the process of dimpling them. You have to get all the spar nutplates in before you put on the top main skin.
Drilling the tank skin is more complicated then the outboard leading edge skins. You can't reach in the and just move the ribs to find the centerline. You have to measure them and then put the skin on and strap it down. You look for your centerlines and make adjustments as necessary. I have to take the skin off several times to get all my lines to show. I did use a small pick and I pushed the ribs over slightly through the pre-drilled holes to get the lines to be right on center. The tops of the ribs must be right on however as this is where it's secured with thread-all. The ribs have enough flex in them that you can move them 1/8 either way to get things to line up.
I have to use the pick method a lot more when drilling the bottom side. I had one rib on the bottom that did not want to come in line so I have to pull it all apart and make an adjustment. Luckily, I had most of the skin drilled so I had all the holes to line it all back up.
Next thing is pull it apart, trim the edges, line it all back up and drill the screw holes. I also have some very fine filing to do where the two leading edge skins but up to each other. I have a small gap on the nose of the joints. I will file this on the corners near the spar then move the whole asssembly over so I get a perfect but joint. I have not drilled the top screw holes to full size for this very reason. I can move it over a 1/16th and then re-drill the holes to full size.
Saturday, December 26, 2009
Monday, December 21, 2009
Drilling on bottom skins
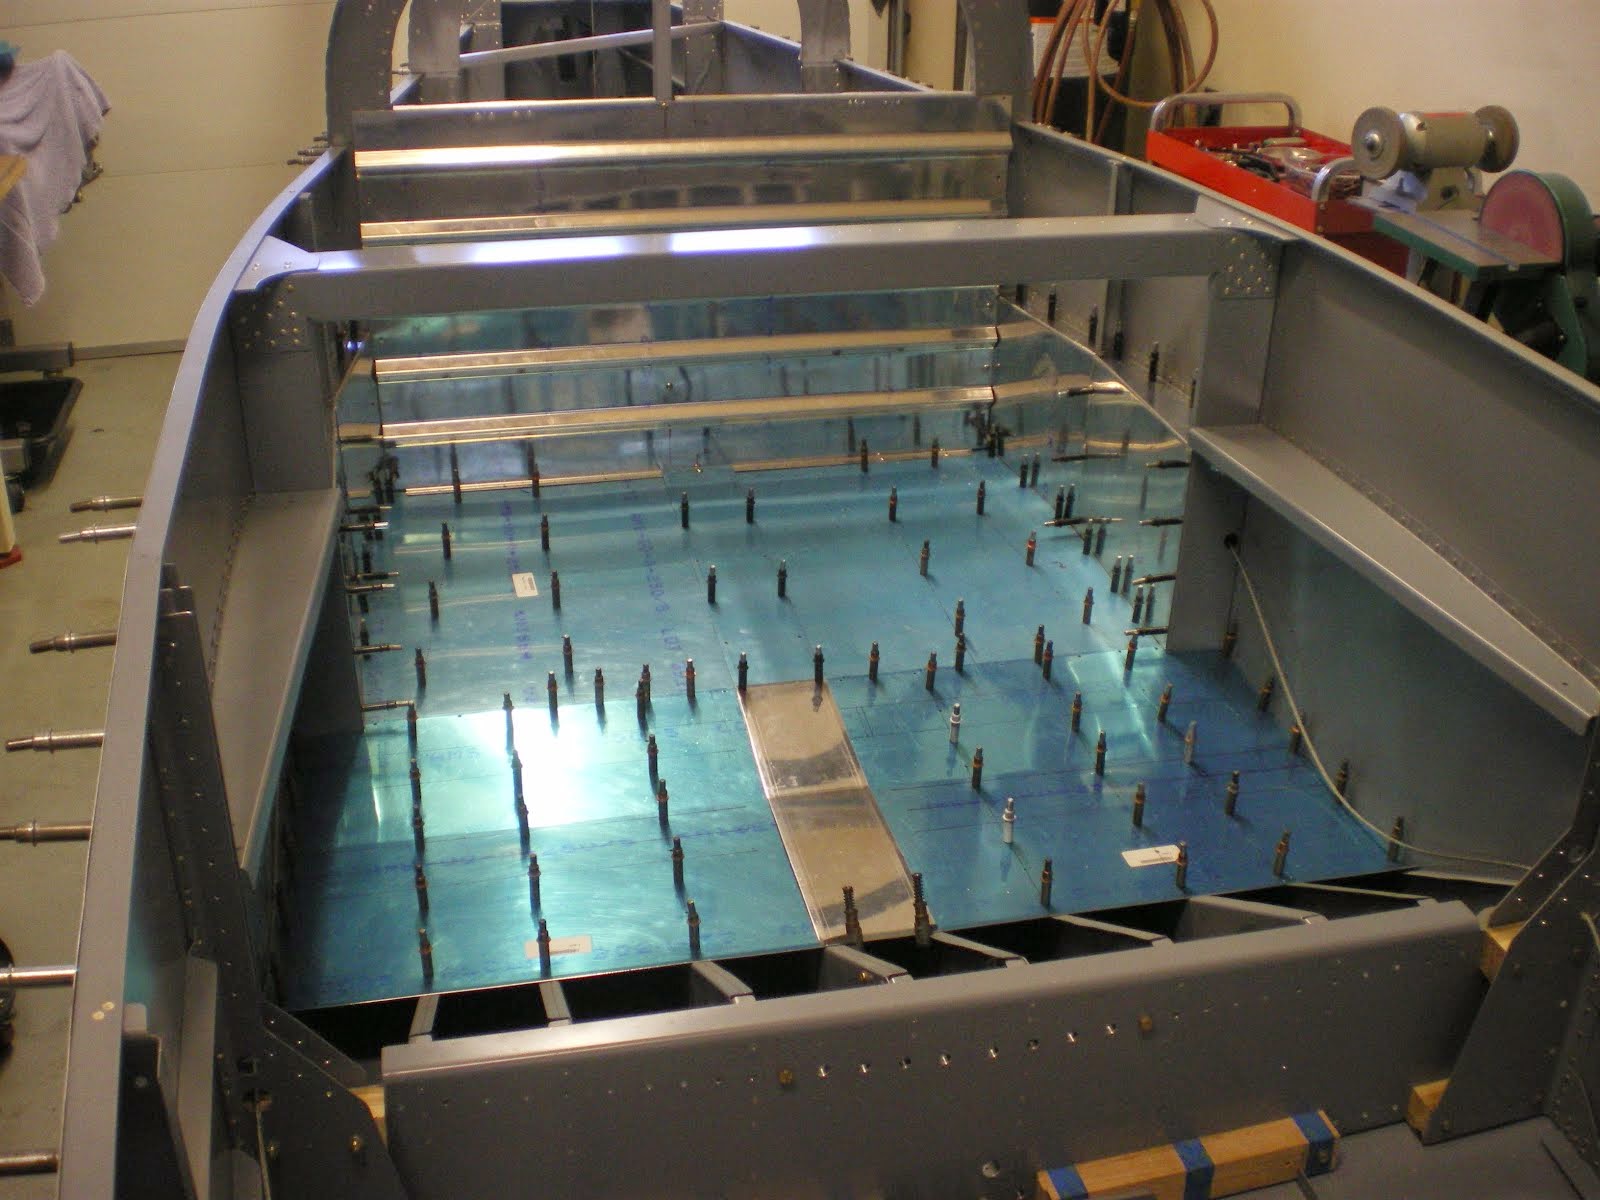
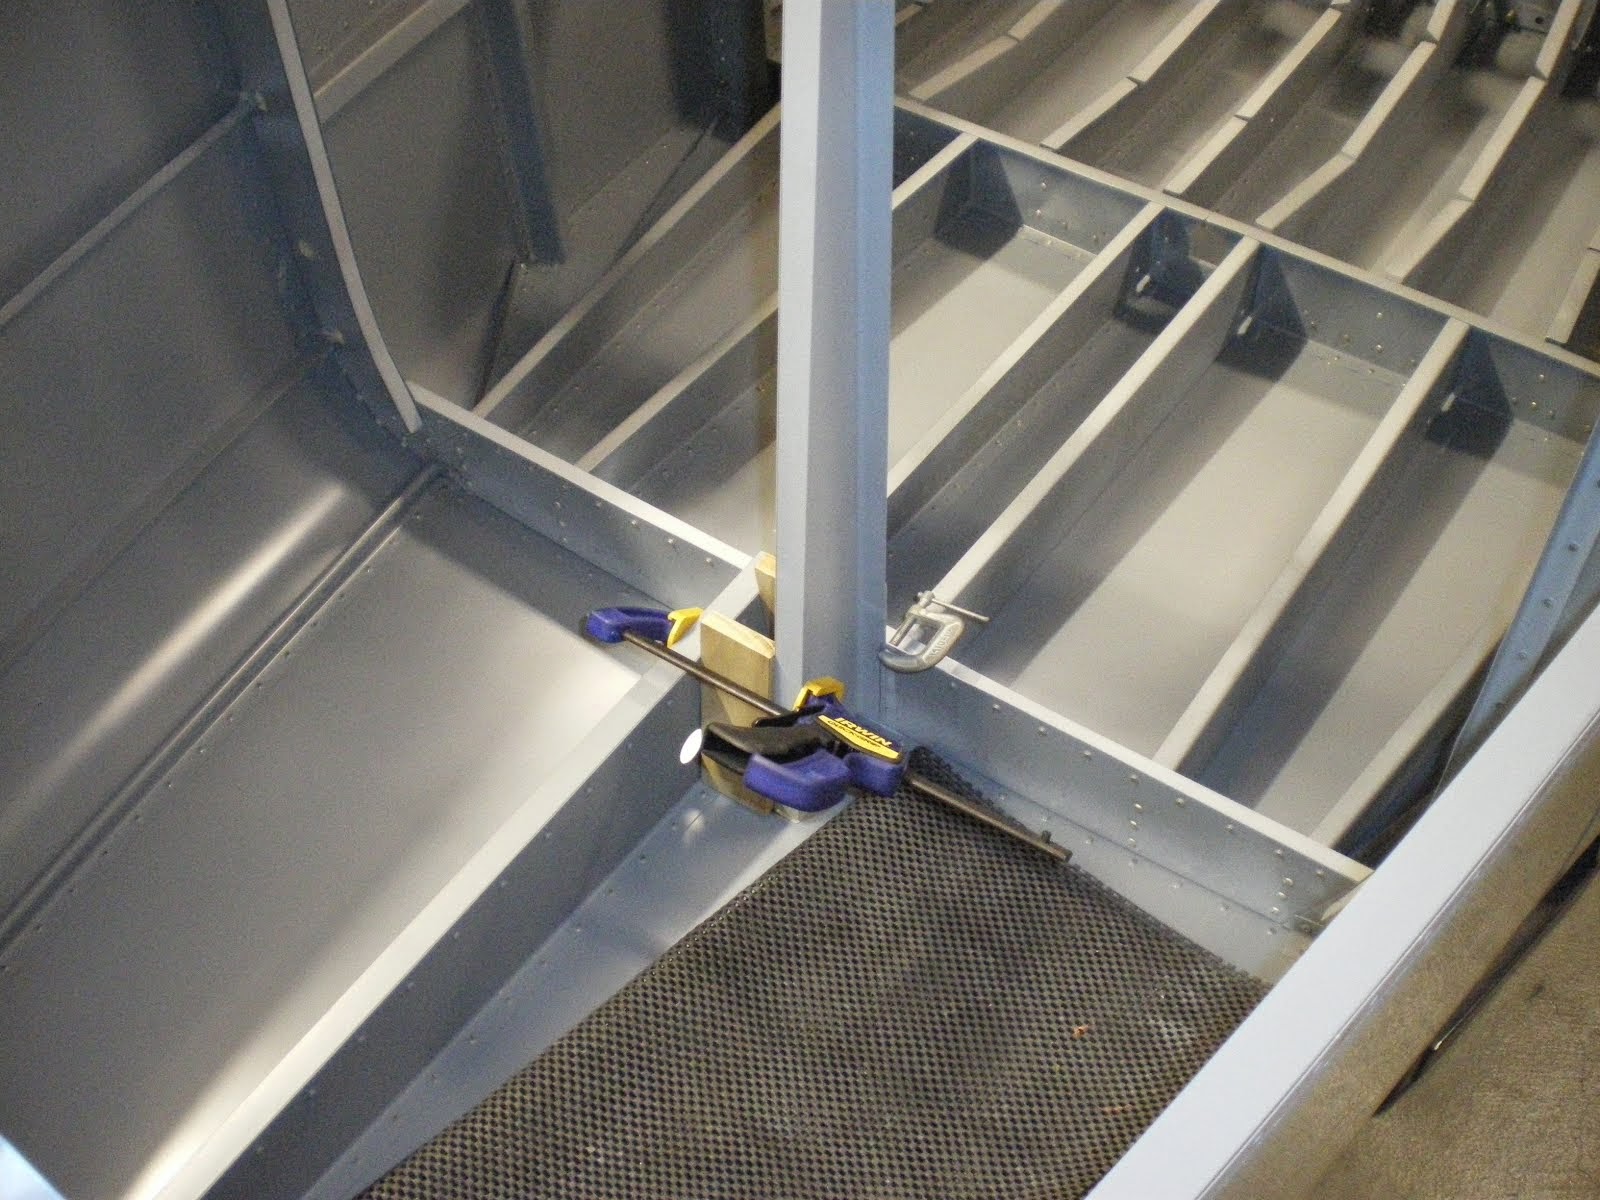
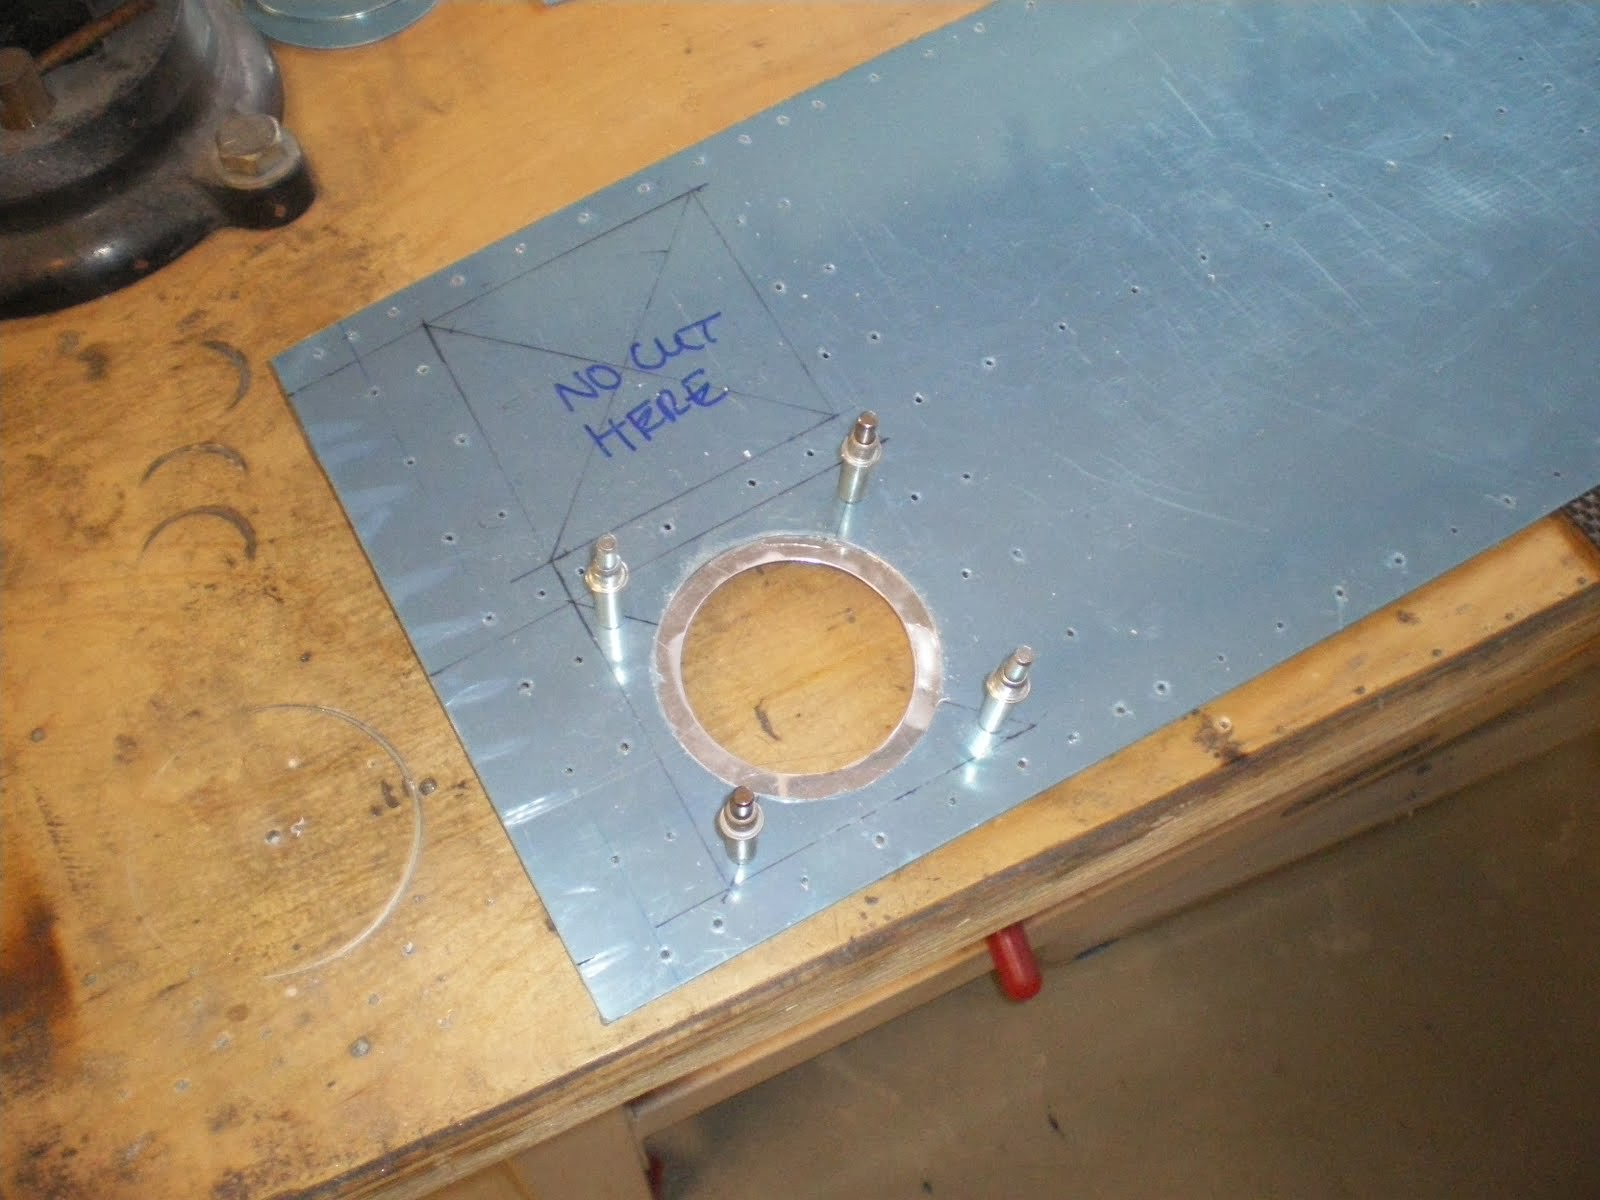
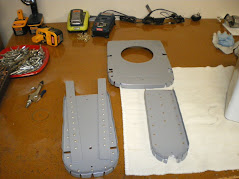
I have drilled the bottom wing skins on. This the last step before I can start drilling on the tank skins. Once I have drilled the tank skin on, it will be time to start pulling skins off and start the long process of deburring, dimpling and priming skins. The one thing I hate about wings is there is two. You have to do everything twice. I have made up the access cover and drilled the screw holes for that as well. I have to make sure and get the nutplates mounted before I attempt to put on the bottom skins. I had to do a little shaving of the outboard skin where the leading edge skin butt joints the bottom skin. It did not fit near the end and so I shaved it down a bit. I have also drilled the overlap of the outboard with the inboard skins. I will joggle this overlap so it is not so pronounced. The you file the edges down so they lay down nice and flat. I though about just doing a one piece bottom skin in .032 but that would be a lot of money. A 4x12 sheet is about 400 dollars now. Then there is all of the cutting and trimming to make it. Plus it's a few more pounds. A few there and here and next thing you know your plane weighs 1200lbs :).
Tuesday, December 15, 2009
Working on tank skins
I have drilled on the top skin and leading edge skin as you can see. Now I am working on the tank skin. I have been getting it ready to drill by using the original skin as a template for drilling the hole pattern where the rib stations are located. I cannot use the whole skin due to my tank being bigger than stock. My ribs are slightly closer together and I have two more of them in total. I have to take the skeleton and mark the layout of the ribs onto the skin. Then I take the stock skin and lay it over the bigger skin. I back drill the rib station onto the bigger tank one at a time. I use the very edge of the skins to align with each other. I then can see the marks I made through the drilled holes in the stock skin. I clamp everything down an then drill away. It took about two hours to layout the top and now I have to work on the bottom. I not drilling the holes in the back baffle or top of the spar flanger area because I want to move them to actual centers. The stock skins are just slightly off, which is one draw back of have skins drilled and not the ribs or spars. The new kits have everything "matched hole" so there is not this problem anymore. It is nice to have the skins as templates for certain things as it saves a lot of layout time. It also makes are your rib lines straight looking. Hand built airplanes have wobbly looking rivet patterns because they are hand drilled and it's hard to get everything perfectly straight.
Friday, December 11, 2009
Drilling on leading edge skin
I have drilled on the outer leading edge skin. This skin is .032 compared to the .025 skin provided in the kit. It will be stronger and it's same thickness as the main skin so there will be no lip at the butt joint. I used some plywood stringers and ratchet straps to clamp the skin down to the ribs. This really works nice to stretch the skin out over the ribs and hold them down. I mark the center line of the ribs with a red marker, then just pull the ribs in alignment by looking at the line through the pre-drilled holes in the skin. If you lay out your ribs off the skin it works well. If you the measurements from the plans your ribs will be off the centerline from the skins and then you'll be pulling them over into place. Next will taking everthing apart and deburring the holes, dimpling, priming and then riveting. I will build a cradle for the leading edge so I can rivet it off the wing.
Tuesday, December 8, 2009
Top Wing skin drilled
I have drilled on the top wing skin. I have mounted the stub rib to the rear spar and wing skin. I have also mounted the bellcrank braces at stations 73.5" and 83.5". This helps reinforce the bellcrank rib from forces applied by the aileron. I have also drilled on the leading edge skin to the top spar to mount it. I will clamp it down and put straps on next, then I will drill the rest of the skins on after that. I have to brace the root rib so it's square to the spar flange and then put thread-all in the leading edge ribs to keep them at equal distances apart.
Tuesday, December 1, 2009
Doug Eves is coming out West
I spoke with Doug Eves today and he is going to try and get out West in June/July of 2010. I look forward to seeing Doug and his pretty RV-6 that I built. Doug keeps the plane in pristine condition and it is basically his third child. I never had any regrets selling my RV-6 to Doug as I know it's kept in top condition and he thoroughly enjoys flying the plane. You have to be a builder to understand the satisfaction you get knowing someone else is enjoying the fruits of your labor. I also know that Doug appreciates my efforts in building the plane. Besides, now I have to build one a little bit better or he will never let me live it down. I also plane to blow his wheel pants off with this one by making it faster. I hope Doug makes it out and we can explore the Northwest and BC. Maybe even get in a little fishing too!
Back Drilling the Wing Skins
I have back drilled the outboard wing leading edge skin. The original is .025 and is much longer than mine. I have a .032 leading edge skin that I got from Harmon. My RV-6 wing is the same length as the standard RV-6 wing. However, my gas tanks are longer-thus holding more gas. The leading edge skin is therefore shorter and I have upgraded it to .032. My tank skins are longer than the original and my ribs are closer together for added strength. I have back drilled the four outboard rib locations to my .032 skin. I will have to blind drill the edge rib that it close to the gas tank. The next thing I must do it start drilling the main wing skins onto the ribs before I can start drilling on the leading edge skins.
Saturday, November 28, 2009
Ready to skin
I am very close to being ready to skin the right wing. I have put the nose ribs on and have gotten them all straightened. I have to tie them all together with some thread-all so I can get my rib spacing correct when I start to drill on the leading edge skin. I won't be putting a landing light in the leading edge skin on this airplane. It will go in the wing tips. This will save some time as I won't have to cut a bunch of holes in the skin. After I get the skin drilled it will be time for deburring and dimpling skins. Then on to primer and bucking rivets. Once the leading edge skin is in place and riveted down, I will get the main top skin drilled on. This will lock it all into place when that skin is riveted down.
Monday, November 23, 2009
Wing Jig
I am getting the wing jig close to being done. I have gotten the stantions mounted to the floor. I smoked three concrete drill bits to get the job done. I even have a roto-hammer and it still took three bits. My concrete must be really hard. Now that the stands are mounted I have put the wing in place so I can attach the lower arms to mount on the rear spar attach points. I didn't want to mount them when I was building the stands in fear I would get the demensions off and have to redo the mounts. This jig sits a little higher than most but I spend a majority of my time in the middle part of the wing. This will keep me from having to bend over all the time. Plus I can sit down on a chair and the work in at eye level.
Once I get the mounting complete I can start working on leveling the wing spars and getting the twist out of the wing. Then it will be time to start skinning this thing and getting some rivets bucked.
Once I get the mounting complete I can start working on leveling the wing spars and getting the twist out of the wing. Then it will be time to start skinning this thing and getting some rivets bucked.
Monday, November 16, 2009
Getting started on the wing jigs
It's been a long time since I have worked on the airplane kit. I have gotten the front yard in, wrecked my Red VFR you saw below and repaired it, wrecked my truck, and blown up the engine in my wife's Passat since I've written last. It's been a long and painful summer/fall. However, we are putting that all behind us and moving on. I am starting back up on the kit and have purchased some steel to make a wing jig. Most people use wood but I opted out of that since my garage ceilings are so tall. Wood also warps and twists when it dries out. It's also hard to find a straight piece of wood anymore at the lumber store. Steel is much better and won't warp. Since I work in a mill, I have found some scrap and bought it and will be pieceing it together. The jig will mount on the floor at each end of the spar with four concrete bolts. I will be able to adjust the plumb for each stand as well as the arms the spars lay on. Once it's set it will be rock solid and I will use my lasar plumb line to make sure there is no twist in the structure. I can also use the lasar to align the chord line of the ailerons with the chord line of the wings. It beats trying to measure and transfer this stuff. I had to move my ailerons on the last airplane because I did not get it right the first time and it flew crooked. Once I bought new brackets and redrilled them, it flew hands off. Leasons learned. Look for some pictures later of the jig building process. I might even build a steel jig for the fuselage when the time comes.
Friday, June 19, 2009
Fabbing up the gas tank
I have been working on getting all of the gas tank ribs prepped and fabbed up. You have to cut holes in each rib for gas to pass through. There is also several vent holes near the top of each rib. I have also modified the back baffle plate as well. I have cut access holes in each bay so I can reach in and apply pro-seal from the INSIDE of the feying surfaces. The plans call for you to goop up the flanges and just dropp it in the skin and then use about 100 clamps to hold it all in place while it drys. I had a leak in my last rear baffle joint and had to take the whole tank off and re-seal that bay. I ened up cutting holes in the back and going inside of it to apply a bead of pro-seal. This time I will have lots of nutplates to install to hold the access plates down but it will be worth it if a leak ever developes. I have also install the anti-rotation brackets to hold the pickup in place. This complys with Van's AD on this part.
Riveting the wing skeleton together
I have primed all the wing parts and proceeded to rivet the pieces together. It took several days and batches of parts to get everything primed. I used PPG DP40 epoxy primer on all the wing parts. It seems to be pretty durable stuff, but we'll see how it holds up to drilling and dimpling. I have also install the wing tie down brackets and the bellcrank rib. I am not going to rivet the 4 root ribs as they are too close together. When you get your top/bottom skins drilled on and ready to rivet on then you place each rib in one at a time and rivet your way out of the wing. It's easier to get all all the rib flanges. Learned this the hard way trying to rivet in between each rib during bottom skin assembly on the last two airplanes. It's a bunch of gymnastic manuevers to try and get it with all the ribs in there. When I get the wing jig it will be time to mount the spar in there and get going on the leading edge skin.
Sunday, May 31, 2009
Wing Assembly
I have finally gotten all of the ribs drilled onto the spar. I now have to drill the ribs to the rear spar. After this is completed I will then go through all of the parts and etch/alodine/primer them. Once that is complete, I will rivet all the pieces together and then rivet the ribs to the spars. I can then mount the wing into the jig and start rigging it up to drill skins on.
Wednesday, May 20, 2009
I won an award
The airplane pictured on this site is my first RV-6 I built. I completed it back in 2004. The guy flying it now is my good friend Doug Eves and he lives in Canada. Doug took her down to Sun-n-Fun this year and had here judged. WE won a outstanding workmanship award for homebuilt aircraft. Not to bad for Doug and I. Although Doug did not build this airplane, he takes care or her extremely well. I don't know of too many other airplanes that win awards 5 years after they are completed. She STILL looks like the day I brought her out of the paint shop. Nice job Doug!
Working on the main spar
I have been hard at it, working on getting the main ribs drilled and attached to the front spar. There are 14 wing ribs and 7 nose ribs to drill onto the spar. There is also lots of angles to fab and drill to the ribs. Several have to step over the flange strips to attach to spar web. The angles get bolted to the strips and then riveted to the ribs. They also act as stiffeners to keep the spar from twisting. It's no wonder the wings are rated for 9 G's-they are hell for stout. I have also been thinking on how to attach the nose ribs since I moved the gas tank outboard one rib bay. I'll get it but you have to sit there and stare at it for while to get it all worked out in your head. Once this is done, the rest will be easy.
I have been doing this all on my bench instead of trying to set it up in the jig and do one rib at a time. This is way easier. Once all the ribs are drilled, I will prime them, rivet on the all the angles to the ribs, then bolt them to the wings. I will then take the skeleton and mount it in the jig and get it all plumbed up.
I have been doing this all on my bench instead of trying to set it up in the jig and do one rib at a time. This is way easier. Once all the ribs are drilled, I will prime them, rivet on the all the angles to the ribs, then bolt them to the wings. I will then take the skeleton and mount it in the jig and get it all plumbed up.
Saturday, May 9, 2009
Fabbing more wing parts
I have been working on the rib that attaches to the gas tank. It's undersized and then you rivet and piece of 1.5"x36"x.032 strip to it that gives a flange for the gas tank to attach to. I have also been working on making the aileron bellcrank rib with all the angles that have to attach to it. I have cut the rib out and an fitting all of the parts to it. I have a bandsaw and disc sander that sure make it easier to fit all of these parts. I had to it all by hand with a file and hacksaw on the first RV-6. Once I get these parts knocked out, I will prep/paint them and assemble. Then I can get to fitting the ribs to the wing spars on the bench. That will be a big task making all of the ribs fit to the wing and getting all of the attach angles fitted/drilled to each rib. I am getting smarter on this plane and I WILL NOT BE GOING OFF THE PLANS for dimensions. The pre-punched skin rib locations are not in the same place as the plan dimensions. So what you do it lay the rib locations out off the skin. Then you rib lands in the center of each rib location. You only have to make the angles that attach to the spar fit and sometimes that means going to a 1" wide angle to edge distance when you back drill through the spar rib location. EVERYTHING on these airplanes is bash to fit, paint to match.
Tuesday, May 5, 2009
Riveting the rear spar&misc pieces
I riveted the rear spar pieces together yesterday. Didn't take too long to complete that job. I then started working on all the misc items in the wing. I fabricated the wing tie down. The old way was with a piece of 1/2" alum. stock and then you bolted it to a piece of angle that was riveted to the spar web. Two bolts went through the spar flange strips as well. It was located in the middle of the wing. The problem with that location is that the pitot tube is also located slightly outboard of the tie down. RV's have short wings compared to most other airplanes so when you pulled up to a tie down at an airport and tied your plane down, the ropes went out a extreme angles to reach the ground. These ropes would run right across your pitot tube so in a wind storm with all the rocking the airplane does it would bend your pitot tube all up. I learned this lesson on the first plane. Since then I have moved the tie down to the outboard section of the wings. I still mount them to the spar flanges but I used the RV-7 style and they have a larger area to clamp to the spar and the web. This will work great and should get my tie downs close to being over the top of most airport anchor spots.
The other items I fabbed up was the bellcranks. I had this great idea to use RV-7/8 style bellcranks but it would not work on my RV-6. I extended the gas tanks where the brackets mounts is right under the tank extension. This part is riveted to the spar and there would be no way to service the bellcranks. SOOOO I punted on this and just starting making the old ones. The RV-6 uses bearings in their bellcranks instead of bushings so you get a smoother feel. It's more parts and more work to install them over a -7 kit but in the end, your control harmony is better. I return the -7 parts next time I go to Van's. I am also working on getting the ribs for the bellcrank assembled and the .032 tank rib with the nutplate strip in it. I want to get all of these parts fabbed and painted so I can start assembling the skeleton of the wing. I will do this on the bench and then mount it in the jig. You can flip this thing over to get better drilling access than you can hard mounted in the jig.
The other items I fabbed up was the bellcranks. I had this great idea to use RV-7/8 style bellcranks but it would not work on my RV-6. I extended the gas tanks where the brackets mounts is right under the tank extension. This part is riveted to the spar and there would be no way to service the bellcranks. SOOOO I punted on this and just starting making the old ones. The RV-6 uses bearings in their bellcranks instead of bushings so you get a smoother feel. It's more parts and more work to install them over a -7 kit but in the end, your control harmony is better. I return the -7 parts next time I go to Van's. I am also working on getting the ribs for the bellcrank assembled and the .032 tank rib with the nutplate strip in it. I want to get all of these parts fabbed and painted so I can start assembling the skeleton of the wing. I will do this on the bench and then mount it in the jig. You can flip this thing over to get better drilling access than you can hard mounted in the jig.
Thursday, April 30, 2009
Drilling the rear spar flange strips
I have have been working on the rear spar, getting the flange strips cut and drilled and making the rear spar attach doubler. I fabricated the aileron bracket doublers and have etched, alodined and painted all these pieces. I have to paint the rear spar with some epoxy paint which I will this weekend. Once this is done and dried, I will rivet on all the pieces. I can then move on to the ribs and start deburring all the edges and lighting holes then flute the ribs to get them straight. I will then start attaching the ribs to the spars on the bench before I mount the whole thing in the jig and prepare for drilling on wing skins. One thing to note about the rear spar is that it's has a Z bend in it. However there are two different angles on the bend. One goes on the top and the other on the bottom. You reverse them to make a right hand/left hand spar. You have to stop and think about that before you make two left hand spars. Van's gets calls all the time about guys making two of the same part. Airplanes are symetrical so you have left and right parts.
Starting on the wings!
I have started on the right wing. I am modifying the spar a bit to extend the gas tank attach plate. I had to drill out the 3/16" rivets 13" past the standard RV-6 attach plate. The new gas tanks with be about 13" longer which should hold about 10 more gallons total or 5 gallons per side. I purchased Harmon Rocket III gas tank skins, baffles and leading edge skins from Harmon. Having the extra gas will be helpful when traveling long distances and give me peace of mind knowing I have an extra hour of gas to get down safely. I thought about using aftermarket aux tanks, but they are expensive, complex to pipe in and hard to mount. It's just easier to make the tank longer. I have to move some leading edge ribs around to fit up next to the tank ribs but it's not that tough. I set up the spar on my drill press and leveled it all up with a machinist level. Once I got things right on I would drill out the rivet with small 1/8" drills working up to #25 drill bit. I then punched the rest of the rivet out taking care not to auger the holes out. I then cut the attach plate and lined it up with the top of the standard attach plate using aluminum angle as a straight edge. I want the top of the wing (what you see all the time) to line up well and the bottom will be where it is. Once the plate was all lined up, I backed drilled through the spar holes. I also added some stiffeners under the plate with some bar stock and some angles on the back side of the spar. This will help with the extra load the gas tank will put on the spar/wing and also stiffen the spar, keeping it from twisting. I etched the plate and then dipped it alodine. I am dipping everything on the wing in alodine to help with corrosion resistance. I painted the plate and then bolted it back down to the spar. Using bolts it a little of an overkilled in this area but it's easier then trying to get set up to drive some 3/16" rivets. The ther reason I am using bolts is so I can remove this plate if ever need be.
Tuesday, April 21, 2009
Saving on gas!
I went out and bought a crotch rocket the other day to use a my commuter to work. It gets really good MPG. Too bad it cost me about 4K to get 60mpg. I have to have something to bomb around on/in when I'm not flying a airplane. When I get the plane done, I will most likely sell this thing when I get the airplane going. These things can be expensive and I cannot afford both of these toys at the same time. I like to Italian Red on this bike and I am thinking of painting my airplane with this color instead of the Electric Blue.
Rocket comes to town
My dad came up in the Harmon Rocket to visit. This thing is a beast of an airplane with 260hp in a 1200lb airframe. Start doing the math and it's a lot of hp/lb when it comes to airplanes. It climbs out at 3500fpm no problem and cruises at 230mph. It's good to get incentive to get my project going so I can get out and beat up on the aerial neighborhood.
Finishing the Horz stab tips
One of the last things I have to do to get the tail pretty much done is install the tips on the horz stab. They are little tips but you have to seal the ends up. I made some out of Balsa wood and sealed them up with epoxy resin. I then used some epoxy/floc mixture and set them inside the tip. Once dry I sanded any high spots off and then used Bondo to fill the lows. Once everything is in orded on the tail, I will get it packed away in the shed and start on the wings.
Sunday, April 12, 2009
Finishing the tail
I have been working on getting all of the details of the tail kit wrapped up so I can start on the wings. I have been putting on the tips and fiberglassing/filling for several days. This part I really hate but it has to be done. If you want it to look nice and finished you must do a good job of attaching the tips to the ends. I laid up fiberglass over the tips and smoothed it all out on the last RV-6. I am not going that route this time. I attached the tips and am making a nice seam between the metal and the tip. When it gets painted, it will look nice and crisp without having all of the weight, time and material that I had in the last one. I also am fitting the elevators to the horz stab and getting everything rigged up. Once this is all done, I will store it away in the shed and get started on the wings.
Wednesday, April 1, 2009
Working on left elevator
I haven't posted in a while. I have been working on the left elevator and trim tab. This elevator takes about twice as long to build due to the trim tab being part of the elevator. There are a lot of extra parts and trying to get it all to line up and not have any twist in the elevator or the tab is difficult. Usually there will be a little twist and you end up with a slight V is the trailing edge of the elevator when you look at it on edge. I haven't seen too many RV's with straight ones. It's just the nature of riveting it all together. One change I did make to mine is I did not fold over the tabs on the ends of the trim tab or elevator. I make little ribs for each end and install them. It makes a nicer end and you don't have to worry about ruining the skins if you don't get the bend just right. The Rocket kit I had did this as well.
I went down to Van's last week and picked up my fuselage kit. It was a good time and only 12hrs of driving to get it. Saved about 600 bucks in shipping and crating. The newer kits are som much nicer than the older kit I used for my first RV-6. Still have to drill lots of holes but I don't mind that much. I tricked it out again by adding all of the upgrades you can get. It will be another slider canopy, dual brakes, electric flaps, aileron trim...ect. Also got the wing tips as well, as shipping these monsters takes lots of $$$$$.
Getting the elevator finished up and will install the tip tomorrow. Then it's on to fiberglassing the tips and fitting everything together.
Saturday, March 7, 2009
Finishing the right elevator
The elevator is made the same way as the rudder-in V blocks aligned on the bench. The major difference to the rudder is that there are counter balances that go forward of the hinge line to offset the weight of the elevator. This makes the controls feel very light and it also reduces the chances flutter in flight. Flutter can rip the control surfaces right off the airplane. It mostly applies to airplanes flying over 200mph. You assemble the skins with the stiffeners and the skeleton then put it in the jig and drill the end ribs to the skins to set you alignment. The spar and skins come predilled. Deburr and dimple all your new holes then it's back into the jig for riveting. All except the tip end where the counter balance is at. You have to fit the conter balance and weight to the tip and drill it all in place. You have to pay attention to the two end ribs and make sure they don't twist during the drilling process. This will give you uneven gaps between your horz stab and elevator. You will see this uneven gap and it will stand out like a sore thumb. Once it's all drilled, you debur , dimple, and prime the inside of the counter balance. Assemble it all together and rivet. Make the tip fit and pop rivet the tip on. Next comes the epoxy/floc you have to do to fill in the end over the counter balance weight. It will have to be molded and then all sanded and filled before painting. I usually wait to do all the tail fiberglassing at once because it sucks.
Finish the Rudder
I have finished the rudder some time ago and I am just getting around to posting the pictures. The rudder has it's own challanges in that it has the rudder horn and tail light in it to build. Getting the bottom rudder fairing to fit correctly is also a PITA.
Some time back I primed all the parts and assembled the skeleton of the rudder. I then backriveted the stiffeners to the skin. I backrivet as much as I can because it gives you a smoother skin surface overall and it all adds up to drag if your skins are not smooth.
Next comes the jigs. I found some extra plywood from a felt box down at the mill and hauled it home. 3/4" plywood makes some nice jigs. I measured the spots on the skeleton where I wanted the skin supported and then measured the skin V at each location. I then transferred this to the plywood and cut them all out using the skil saw and cut the V's in the band saw. I then squared up the edges on the disc sander so the jig would be square to the bench. I leveled my bench top and then made a centerline on the table top. I made 90 degree lines from the centerline at each jib location and them attached the jig to the table top with brackets and laser aligned the top and bottom of the V's on the jig so that there is no twist in the two V's relative to each other and everything is centerlined to the table top. It is critical that you get this right as your control surfaces will be twisted if you don't and this will make the plane fly out trim which all caused drag and loss of speed. Believe it or not some guys have reported up to a 15mph loss of speed by making things out trim. That's a lot of gas to make up the speed with extra power.
Once the jig made you assemble the skin and skeleton and slide it down into the V blockes. The spar is already drilled from the factory, you only have to drill the ribs to the skins which is where your alignment is anyways. I also used a laser plumb line during the process that shoots a line on the centerline of the V blocks and end ribs. This tells me if anything is getting out of line.
After the ribs are drilled it back apart to dimple and debur all the new holes in the ribs. Back together and then it gets riveted back together for good.
The skins come straight so you have to bend the curves to pull the two skins together at the front of the rudder so it can fit behind the vert stab spar. I use a piece of pipe and some duct tape then lay the rudder flat on the bench and clamp it down. You roll the skin onto the pipe to make the curve needed to get both side to come together in the middle. The you pop rivet this all together and this is what makes the front of the rudder.
Next comes the rudder bottom with the tail light. I opted for just the position light with no strobes. My light did not lay down flat on the mount for the light so I had to build that up with epoxy and floc. I also decided to pop rivet the bottom of it instead of screw it on with nutplates. You can get the light and wiring out of it just fine without having to remove the rudder from the airplane. Cutting the fairing to fit around the rudder horn is a PITA. What I did is take some tape and taped it around the horn then pulled it up carefully then put it back down on the fairing and marked it out. I cut it out with a dremel and it fit perfectly. I wired all of the wiring for the light and then I had to put some small nuts on the inside of the light mount in the fairing. This gives you something to screw the cap into to hold the glass cover over the light. This is all at the end of the rudder tip so there is not much room to get those nuts down in there and then epoxy them in. Once this is all done, I mount the light and fairing and then do the top fairing as well.
Saturday, February 7, 2009
Vert Stab
I finished the vert stab today. The girls and I riveted the skin onto the skeleton. The had fun picking up all the little rivets out of the container. The vert stab is constructed the same way as the horz stab except that the upright angle on the jib is moved over to clamp the end of the stab spar to the upright. It was directly in the middle of the jig on the horz stab. The vert stab is not the long. I have been using a tungsten bucking bar for the vert stab and it works great. It's small and heavier than the steel bars I have been using. I can take down the jig now and get the garage ready for the rudder and elevator jigs. I will start on the rudder next. It has all of the good stuff like strobe lights and tail lights on it. The last plane I pop riveted the bottom fairing onto the rudder. This one I will use #4 screws with nutplates so I can removed the fairing to access the lights.
Saturday, January 31, 2009
Horz stab done!
I finished riveting the skins on last night. I does not take long to rivet them on once you get going. After I got both skins drilled, I proceeded to debur, dimple and prime the skins. This takes some time, especially the dimpling process. Wrestling the skins open to get them into the C frame dimpler and not punch holes in the skins is challenging. You really need to people to do this job. But I didn't have anyone around so I used my shoulders and head to hold the skins open and then put weights on the bottom skin to keep it from flopping back up. I would then put the dimple down onto the male die and whack it with a dead blow hammer. There is a little flexing in the C frame so on my next skin I am going to put a stick of metal bar under the bottom of it and extend it down to the floor. This will keep it from flexing and give superior dimples.
Once the skins were primed with epoxy paint, I smashed down the leading edge of the skins so they would conform to the ribs better. The skins are open at about a 90 degree angle so you can dimple them. You want them open at about a 40 degree angle when you put them on. This will make a better curve on the nose rib. I riveted the top of the skins first, starting out at the tip and them working my way up the front spar and working out of the skin. After the top spar is riveted then you work youself out down the middle rib. All of the rest of the rivets can be squeezed. Every rivet I install, I slightly shave the dimple with my deburring tool. This seats the rivet down into the dimple a little better and you cannot even get your fingernail under the edge of the head when your done. This also helps paint lay down on the rivet as well. I' ve seen paint jobs were the paint will form a ring right around the head. It stands out all of the rivets and the paint will bridge the gap. It looks funny and it is easily remedied by taking time to shave the dimple holes. Another thing I do it leave out the end rib so I can install rivets into the middle nose rib. It says to use pop rivets but I put real rivets in the TOP side so it looks good. I the cleco the skins back down on the bottom side and pop rivet the bottom side of the nose rib on. This pulls the skins up to the rib making a nice formed shape of the nose. If you tried to rivet both side you will dent the bottom one because of the sharp curves. I just fill in the hole of the pop rivet with some JB weld and once painted it looks like a real rivet. Don't forget to take off the nuts that hold the end ribs in place. I've heard of people riveting their skins on then remembering that the did not remove the inside nut and their skins are all closed UP. Bad news there.
Once the skins were primed with epoxy paint, I smashed down the leading edge of the skins so they would conform to the ribs better. The skins are open at about a 90 degree angle so you can dimple them. You want them open at about a 40 degree angle when you put them on. This will make a better curve on the nose rib. I riveted the top of the skins first, starting out at the tip and them working my way up the front spar and working out of the skin. After the top spar is riveted then you work youself out down the middle rib. All of the rest of the rivets can be squeezed. Every rivet I install, I slightly shave the dimple with my deburring tool. This seats the rivet down into the dimple a little better and you cannot even get your fingernail under the edge of the head when your done. This also helps paint lay down on the rivet as well. I' ve seen paint jobs were the paint will form a ring right around the head. It stands out all of the rivets and the paint will bridge the gap. It looks funny and it is easily remedied by taking time to shave the dimple holes. Another thing I do it leave out the end rib so I can install rivets into the middle nose rib. It says to use pop rivets but I put real rivets in the TOP side so it looks good. I the cleco the skins back down on the bottom side and pop rivet the bottom side of the nose rib on. This pulls the skins up to the rib making a nice formed shape of the nose. If you tried to rivet both side you will dent the bottom one because of the sharp curves. I just fill in the hole of the pop rivet with some JB weld and once painted it looks like a real rivet. Don't forget to take off the nuts that hold the end ribs in place. I've heard of people riveting their skins on then remembering that the did not remove the inside nut and their skins are all closed UP. Bad news there.
Friday, January 23, 2009
Drilling on the horz stab skins
I have completed the assembly of the tail jig. It only took about 10 trips to the hardware store before I got everything I needed. I had this thing assembled before and where all of the parts went are beyond me. I got everything leveled and square and I had to shim the hinge brackets to get them to line up. The crossmember has a slight bow in it. As long as the rear spar sits level on the jig is all that matters here. It needs to be straight as this is where the elevators hinge on. Any offset will bind the elevators throughout the range of travel and that equals death in a airplane. I installed the stab skeleton and got it squared up and string lined the center of the stab to the centerline of the hinges. If all of the tip center lines are matched up to the same center line of the rear spar then there is no twist in the horz stab. If you have twist, then you have your tail flying through the air crooked and that causes more drag and less top speed. Once the skeleton is one and secured I install the skins. The RV-6 skins come prepunched and so does the rear spars. So these cleco right up. It's the rest of the skeleton you have to drill. I draw center lines on all the spars and ribs. This way I can see where my holes will be. I have several strips of plywood and thread all that I use to clamp the skin down over the skeleton. Once this is all clamped down I start drilling from the bottom up to push the skin up to the tip ribs. You drill yourself off the piece your are working on. That means that you start where the skin is fixed down- in this case the rear spar, and you work up and out to the sides. Doing this will help prevent puckers in the skins. This is not so bad on the tail but you can get in trouble on flat skins like the wing if you don't adhere to the this general rule. I drill the top of the stab skin first and then I drill the bottom. I have sticks and hooks to push/pull ribs as I drill to get the holes in the skins to line up with the center of the spars and rib flanges. It takes longer to set up the jig then it does to get the skins drilled on.
Monday, January 12, 2009
Jig Assembly
Before you can skin the stabs, you have to construct a jig. Usually they are made out of wood, but wood can warp and the wood we get now days is junk. I got one made from steel and it's not lite. It weighs about 750 lbs when all said and done but it's plumb and square. That's all that matters when building the tail. Everything needs to be solid while I drill on the skins. You can see the mounts bolted down to the cross member. This is where the stab connects. I started working on it and ran out of steam pretty quick when I found out the bolts that hold the frame together are too short. I don't know what I used before but they are not in the bag. Another trip to the hardware store tomorrow for some longer bolts. Stuff like this never ends.
Horz stab
Here is a picture of the horz stab. I have beefed this one up with a .063 spar doubler on the front spar. I have also put reinforcing plates where the hinge brackets go. This will give me some extra strength when I'm going 220 mph. Plus is will piece of mind for me. It does not take much to make the structure a little stronger.
Saturday, January 10, 2009
Thank you Roger
My buddy Roger at work looks a my site quite often. He is constantly nagging like an old lady about not getting something posted on there. I have been putting off the build process until I finished a few things around the home. Frankly, I've also just been lazy. But now I'm kickin' it in high gear. So thank you Roger for inspiring me to get off my duff and get something done. It feels good. And since you're the one who complained-you will be the first person called on the wings when I need someone to help buck rivets!!!!!
Building the center section
I'm back! I've started work on the center section. I pulled apart the wing kit crate and inventoried the kit. I put all the hardware away and now I can begin work. I wanted to get the wing center section done so I can put it out of the way.
It comes pre drilled to match the spars. This set is unique set the spars and center section are a match set. The come matched and ID from the Van's aircraft. I could not simply go and buy another section if something were to happen to either the spar or the center section. I would have to try and match drill a new piece to the old one. Soooo be careful!!!!! I put the section together and test fit all the parts. I only have to drill a few holes in the side pieces for tack rivets and drill out the rudder cable fairlead holes. The rest is etching and alodining for paint. I painted the parts and assembled.
It comes pre drilled to match the spars. This set is unique set the spars and center section are a match set. The come matched and ID from the Van's aircraft. I could not simply go and buy another section if something were to happen to either the spar or the center section. I would have to try and match drill a new piece to the old one. Soooo be careful!!!!! I put the section together and test fit all the parts. I only have to drill a few holes in the side pieces for tack rivets and drill out the rudder cable fairlead holes. The rest is etching and alodining for paint. I painted the parts and assembled.
Subscribe to:
Comments (Atom)


