Thursday, June 26, 2008
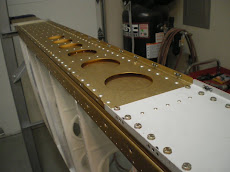
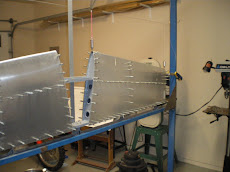
Pics of the engine.
Took several pictures of the piston cooling nozzles. I installed them using high temp thread sealant. I also installed the 1/8 pipe plugs for the galleries after I blew out all of the lines.
Wednesday, June 25, 2008
Getting Ready
Today I started getting organized to begin the engine building process.
I gathered a few items (consumables) like 50W oil(mineral), Moly assembly lube (for camshaft), STP and lubriplate. I mix these two at a 50/50 mix in a small jar. This is my ASSEMBLY LUBE, called elephant snot: it will go on all the bearings, gear teeth, and wear surfaces around the engine so that when it's started up, there will be no damage to the engine. It will also protect the parts during storage. I also have silk thread (oo) for the case halves, aero grade hylomar (for the case halves), aero gasket maker (non-hardening), fuel lube (for bolt/pipe thread lubricant) and a anti-seize lubricant.
I bought my engine enamel from Spaceagepaints.com. I am going with POR-15 high temp engine enamel. It will withstand 700 degrees. The case, assy case, jugs, and sump will all be painted aluminum/silver and the jug bases will be painted gloss black in the same stuff. I HAND PAINT all of my parts with a camel hair brush-two coats. This paint is supposed to have more solids and less solvents. It also has a high gloss and is resistant to chemicals when it is dry. I could have gone with PPG concept, but they really don't recommend that at the paint shop since the max temps for it are 300 degrees. Plus I would have to mask off all of the parts so no over spray gets into the inner parts. I also have two daughters running around the house and I don't need to gas them out with fumes from isocyanates. I will paint all of the parts and take pics later.
Here are some things we need to do the right way from the beginning.
DOCUMENT ALL PARTS!!!!!!
Aerosport provided me with a list of the parts, however if there is a assembly package-like the crankcases and thru-bolts, it does not break this down. I will expand on this list and write down ALL of the part #'s used and any LOT/BATCH or SERIAL #'s. I will have a written copy for the engine book and a excel spreadsheet of it for storage. This is very anal retentive but if there is ever a recall, you know what you have for parts and can do a trace very easily. When Lycoming has a recall on their crankshaft, it only took me 5 minutes to find out if I was going to have to disassemble my engine or not.
Get a good engine stand to build your engine on.
A big table top is great for having everything at your disposal.
Get two-CERTIFIED torque wrenchs. I have one Snap-On in a 1/4" drive in/lbs and one Husky 3/8 drive ft/lbs. The Husky is not certified but my Dad works for a regional airline as a mechanic
and he took this one into work and checked it out on their torque gauges and it was spot on at all check points. So this basically makes it certified. But having a torque wrench that is spot on is a must have when putting together a aircraft engine. There are several no-no's when when using a torque wrench. Never leave the wrench torqued up over long periods of time. This will damage the spring in there and then it will not be accurate. After each session with the wrench, unload it all the way back to zero. If you do leave it by chance, go get it checked out again. There is also a technique to torquing a nut. Don't creep up on it. Turn like you would normally do until the wrench clicks. When torquing case bolts and cylinder hold down bolts, pay close attention to the sequence.
I have a lot of tools to build this engine. I don't have them all-(do you ever) but I have enough to do almost everything. Some of the ones you need the most is the deep sockets and extensions. I also have a set of wobble socket in 1/4" drive. This really helps getting in some of those tight places. Like beind the camshaft gear at the very back of the engine. Some other ones is a set of good safety wire pliers. You will also need some allen drives in 5/16, 1/4, 3/16, 5/32 (if your not using the piston cooling nozzles). Get some feeler gauges, a razor blade, a pair of sharpe dykes, a good set of screw drivers, some small pry bars, a couple of 3/16 punches (to fold over the lock plates). You will need some .032 safety wire.
I also have an assortment of GRADE 8 nuts and bolts-course thread. This kit comes with all of the hardware-we will see. I always get some extra internal lock washers just in case.
There are some specialty tools like cylinder base bolt wreches that I will have to borrow. I will most likely take my cylinders to someone and have them put them together. You need a ring compressor and a special press to press the valve springs down with. We have used a drill press before with a bracket but you run the risk of scraping the valve stem if this is not done right. I will of course make sure this process is captured. You also need a special pry bar to get the front crank seal over the crankshaft flange. If you use a screw driver, you can slip and put scratches in the crankshaft-NOT GOOD.
Today I started on prepping the crank case. I took out all of the pipe plugs from the oil galleries and cleaned all of the threads. I am going to use both piston cooling and camshaft lubrication nozzles on this engine so I am making damn sure there is not any grit in any of the galleries to plug my nozzles. I use compressed air to blast out the passages. I also take a soft tipped air hose and blast out all of the bearing oil passages. I have blown out sand and grit from these passages before after overhauling and getting cases shaved down. It could clog up your oil flow if you don't. THen that means bearing failures and another overhaul.
YOU WANT TO MAKE SURE YOU PUT ALL OF THESE PIPE PLUGS BACK IN THE CASE WHEN YOU ARE DONE. IF YOU LEAVE THE ONES OUT IN THE REAR ASSY HOUSING YOU HAVE TO TAKE IT ALL APART TO PUT THEM BACK IN.
I will be using the 8 ports on the inside of the case that are machined for the cooling nozzles.
I also cleaned all of the cooling/lubrication nozzles with some solvent and checked the small ball valve that is inside of them. The are pressure controlled and won't let on squirt onto the piston or cam until about 50psi is reach. You carefully insert a small wire (.032 SS) into them and compress the spring. I then blew them out. Several were very sticky from the preservative oil that was in them.
Tomorrow I will post some pics of the engine and start installing the cooling nozzles.
Subscribe to:
Posts (Atom)


